


In the beginning…
I’m posting a version of this over on VPForums.org and VPUniverse.com and I thought, hey, why not a 3rd place. Actually, I decided on creating a SubStack to document the journey in greater detail so that it would be accessible and viewable to more people outside the virtual pinball community. I’m hoping to expand on what it is I’m doing and provide more information than I do on the other sites because the audience here isn’t necessarily part of the community that is familiar with all the lingo.
What is Virtual Pinball?
When I refer to Virtual Pinball, I’m referring to a physical machine that uses a combination of software and hardware to recreate the experience of playing pinball on a pinball machine. A virtual pinball machine can contain hundreds of different pinball machine simulations allowing you a multitude of experiences on a single machine. They can also be smaller than a full size pinball machine.
Some Background
I've been wanting to build or get a virtual pinball for some time. I love playing pinball (despite being horrible at it) and when I first learned about virtual pinball I knew that was the best way for me to have one in my home. I was able to get an AtGames Legends Pinball HD (ALP) from Sam's Club on sale in February, 2023. I was hooked. It wasn't long before I stared making changes and additions (mods/modding) to the machine. The first thing I changed was the flipper buttons. One of the drawbacks of the (ALP) is that there’s a little bit of a delay or lag when you press the flipper buttons. One easy way to improve on this is by replacing the flipper buttons. The simplest swap that the community recommends is using Ultimarc goldleaf buttons. After that I really wanted to expand the limited tables available for the machine.
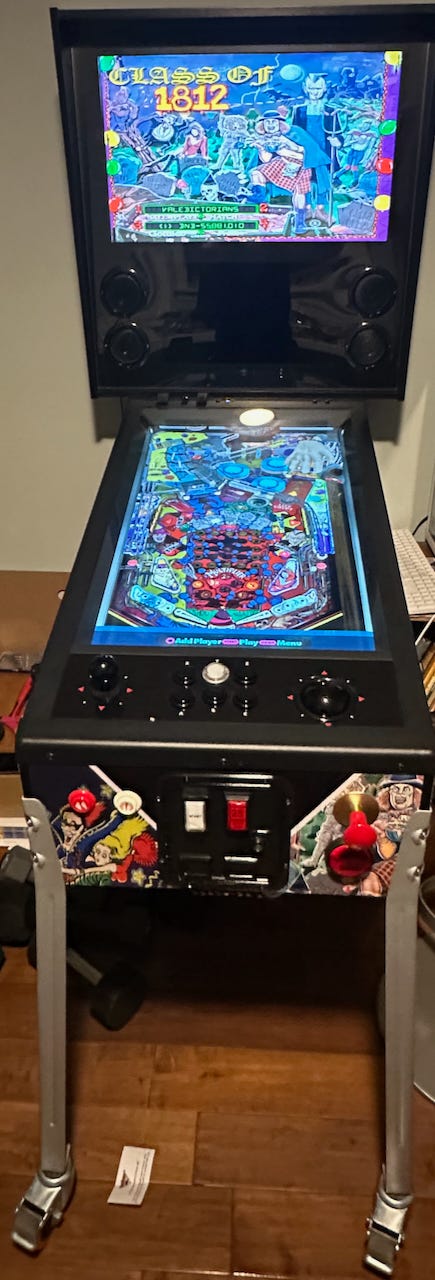
In order to play more tables than AtGames offered, I needed to get a PC that could run the necessary software. This would connec to the ALP through the OTG (On-the-Go). An HDMI and a USB cable are connected from the PC to the ALP. The PC uses the ALP as a monitor through the HDMI and the USB allows it to use the ALP as a controller. I also added the VIBS (Video Input Backglass Switchboard) board. This allowed me to use both the Backglass and Playfield screens with the PC.
If you’re not familiar with pinball, the Backglass is the part of a pinball machine that has artwork for the theme for the table. On some older machines, this would also have your score. On a newer machine, the score is on the DMD (dot-matrix display) screen. On the newest machines, that screen has been replaced by an LCD screen that will play videos as well. It’s still commonly called a DMD. The Playfield is the area of the pinball machine with the pinball.
I started with a mini-pc and was using it to play Pinball FX3 through Steam. The mini-pc was okay, and did fine with Pinball FX3, but I found FX3 to be very “video game” and I really wanted to be able to play some of my all time favorite machines like Funhouse and Addams Family. This meant an upgrade of the PC and learning a whole new software.
Side note: Before this, I think the last Windows PC I owned I bought in 2008.
So, I got a new PC with dedicated graphics card. I installed Pinup Popper as a front end for selecting pinball tables (see video below) and emulators and began learning how to install tables. There are a few different emulators. The main ones as I write this are Visual Pinball 10 (VPX), Future Pinball, and Pinball FX (the successor of Pinball FX3). Each emulator works differently. When I get around to installing these again on the new system, I’ll go into more detail about each.
After I had all that installed, I wanted a more realistic feel to playing. There are a few ways people do this in virtual pinball. I wasn’t ready to spend hundreds of dollars all at once, so I slowly made changes. Since the original purchase of the ALP in Feburary of 2023, I’ve added
Wheels - Caster wheels brought the height of the machine up to make it more comfortable to play. It also made it easier to move.
a haptics kit - This adds some feedback to the flippers using a specific kinf of speaker called an exciter that is installed in the cabinet below the playfield monitor and creates vibrations and sounds from near the flippers.
a flipper solenoid kit - This added an even more realistic feel to the flippers
SSF - Surround Sound Feedback. This is an upgrade to the haptics. It uses surround sound and 6 speakers (2 exciters on the front inside of the cabinet below the playfield and near the flippers, 2 exciters on the rear inside of the cabinet toward the back, and 1 bass shakers on the front floor of the cabinet and 1 on the back floor. These are each powered by small amplifiers that have stereo and sub (2.1) sound outputs for these speakers. Each amp is connected to a surround sound card.
A control board with accelerometer - This allows you ot physically “nudge” the cabinet and effect the gameplay. I started with a KL25Z board (which is a small board that has many uses) and switched to a PinOne mini which is more dedicated to virtual pinball and with ongoing development/updates.
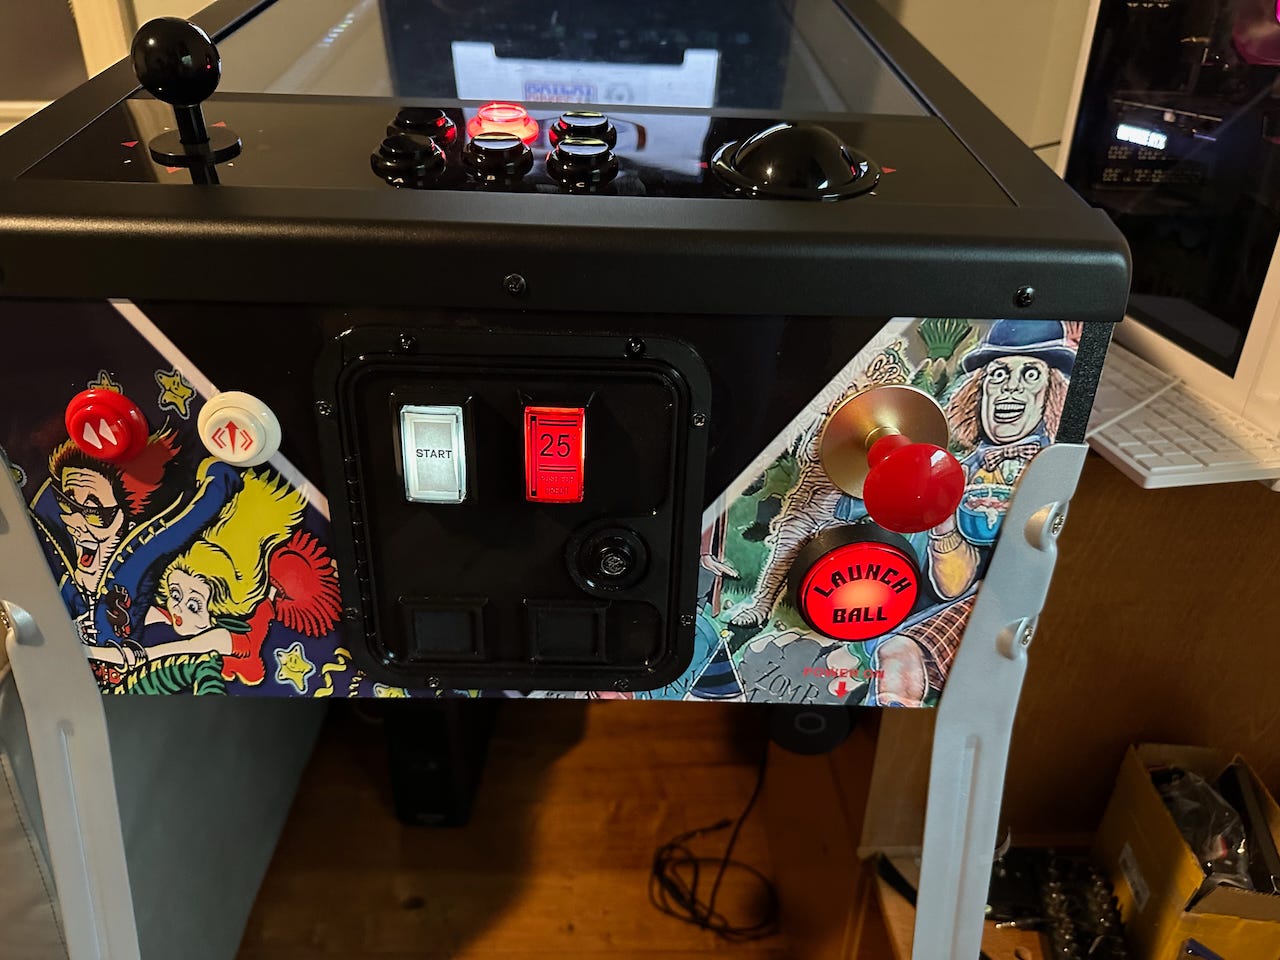
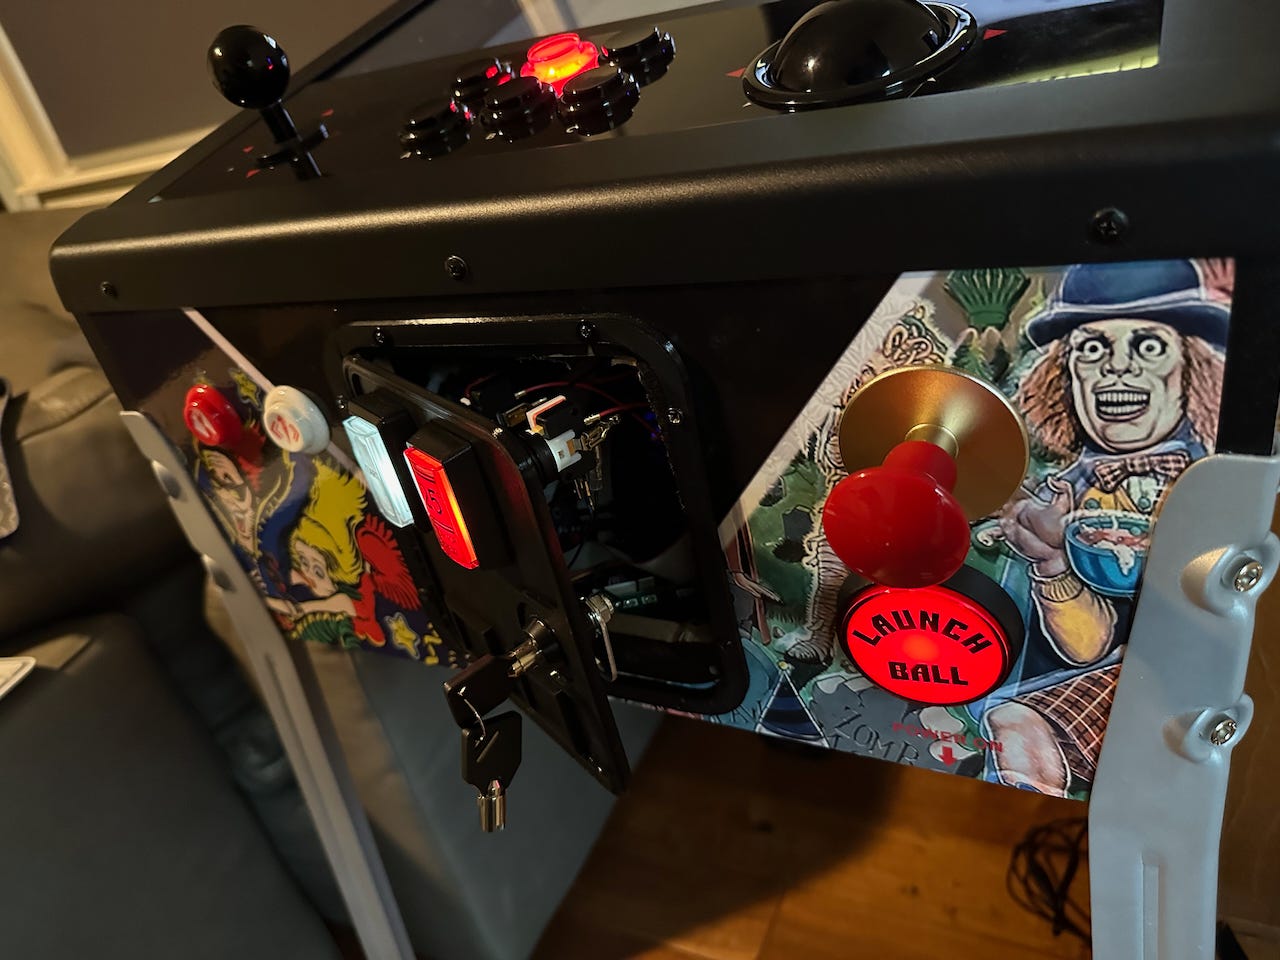
Lighted buttons - These are connected to the control board and light up when appropriate for “Insert Coin”, “Start”, “Launch Ball” and “Fire/Action”

Look at the pretty lights 3D printed coin door - This gives it a more accurate look, but it also opens so I can access the things I’ve added inside easier. The front of the ALP did not previously open.

Open Sesame! Deluxe Backbox 2.0 - The last and biggest thing I added (see the first picture above). Prior to this I was using an old tablet as the DMD screen.
I was almost ready to finish removing all that was left of the original ALP and swapping the main playfield and adding better legs. Meanwhile, I’ve been watching Facebook Marketplace for an empty cabinet I could use. I missed one that was a mostly complete virtual pinball cabinet. A couple of weeks later I saw an ad for a cabinet and in the description, the poster said that they also had a Judge Dredd that would be available soon. I reached out about the Judge Dredd and essentially reserved it. Now that the scene is set, I’ll continue in my next post with my goals for this project and pictures of what I picked up.